Thursday, 5 March 2015

My Favourite Lush Products

I am a big fan of Lush product, I truly believe that everything they sell is worth the money they charge, so here are my favourites from their store so far.

1. The Charity Pot.


Not only does it serve as a killer moisturiser, but also 100% of the profits go to charity! (Except taxes, they go to the government).

2. Rising Phoenix Bath Bomb.

I've tried nearly every bath bomb lush sells, but this is one of my favourites. The scent is described as cinnamon on the website, which is one of my favourite all time scents. The bath bomb itself is layered full of different colours and golden glitter, which turns the bath an amazing colour!

3. So White Bath Bomb.
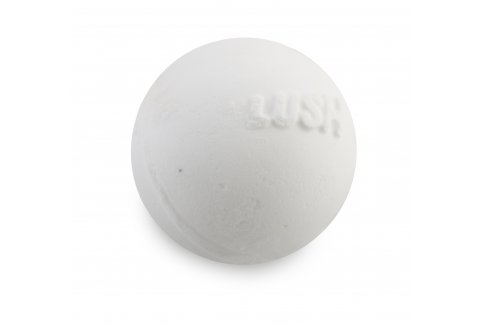
This was one of the first bath bombs I ever bought from lush, and I've been re-buying it every time since. The bath bomb itself looks pretty boring, however once dropped into the bath it reveals a pink centre. The scent is clean and fresh, which I love.

4. D'Fluff Strawberry Shaving Soap.


I was very sceptical about this at first, but it was recommended to me so I decided to try it out. I was blessed with almost white, very thin and slow growing leg and arm hair, so rarely have to shave. This means that products like this don't normally do much for me, as I don't shave often enough to develop dry or flaky skin, but this product surprised me- it leaves me with the softest feeling legs you could possibly imagine, and you only need the tiniest bit! Plus, I love strawberries, which is a bonus.

5. Jason and the Argan Oil Shampoo Bar.
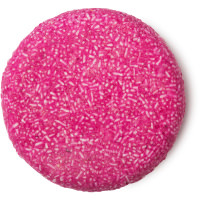

I will warn you guys, this thing smells super strong. It's a great scent but you can smell it from miles away. Nonetheless, it gives my super thin hair life and body, which is what I want from a shampoo, and it's super long lasting!

6. Mask of Magnaminty.


I wouldn't usually go for this product, as I absolutely hate the smell of mint. However, it claims to reduce redness and blemishes, and I've found that all lush products so far have done exactly what they say on the tin. My skin has been playing up the last couple months, and I have no idea why- so I needed something to help calm it down. This isn't a miracle fix for blemishes, but it will reduce them and help calm you skin over time, which is what I'm looking for. I use this once a week and I find that it really helps keep my skin in control!


Wednesday, 4 March 2015

How I Bleach My Hair White

My hair has been bleached white fairly frequently for the last few years:
Photo
Photo
And over this time I have learned a few things about keeping my hair healthy looking whilst still achieving the lightest colour possible. So, I decided to share a few tips and tricks that I have learned along the way. 

1. Coconut oil.


Everybody knows that you shouldn't bleach clean hair, but why? Well, when our hair gets greasy, the oil forms a protective barrier against the bleach, stopping it from drying out or getting damaged. As I don't like to leave my hair get too greasy before bleaching it, I tend to use coconut oil on second day hair instead. Coconut oil is solid, but has a very low melting temperature, so I scoop out a small amount- warm it in my hands and then apply a thick coat all over my hair. I tend to leave this on for around half hour before bleaching, as coconut oil is really good at adding moisture to your hair. 
Don't bother buying special coconut oil branded for use on hair, as organic coconut oil will be cheaper and does the exact same job. You can find this is your local grocery store or organic health food shop. 

2. Generic Bleach.
Rather than use a coloured bleach, such as a cool ash tone or a honey blonde tone- I choose to use a bleach which does not contain a toner and tone my hair myself afterwards. The bleach I use is Jerome Russell's Bblonde bleach in medium lift, as I have a pretty light hair colour naturally.

I choose to use this bleach as you get the bleach sachets and developer separately so there is little to no waste, and I've found that using this bleach allows me to get the lightest colour my hair is capable of achieving.

4. Bleaching Technique.
There's nothing complicated about my bleaching technique, but I thought I should share it with you regardless. Basically, I split my bleaching sessions into two parts. First, I will apply bleach to my roots and the darkest parts of my hair, such as sections which didn't lighten as much last time. I will leave this on for around half an hour (or half the time noted on the bleach box). Then, I will go back and apply more bleach to the rest of my hair, concentrating again on the darkest spots. 

I don't always bleach my whole head, only if a lot of my hair isn't the colour I want it to be yet- as I do frequently change between my natural hair colour and white blonde.

3. Fudge Clean Blonde Toner Shampoo.


Toning is a really important part of achieving the right colour, personally I prefer an icy white colour, and so I use a purple toner. My favourite way of toning my hair day to day is to use a toning shampoo, which is just what it sounds like- a shampoo containing purple dye to counteract the yellow tones in your hair. My favourite one so fair is the Fudge Clean Blonde Violet Toning Shampoo. I apply this like regular shampoo, lathering it all over my hair, and then leave it on for five minutes or so, depending on how yellow my hair is looking at the time. It's a really easy way of keeping your colour up to check.

4. D.I.Y Toner.
If this option doesn't really appeal to you, you can save a lot of money by making your own toner or toning shampoo. All you need to do is buy a dark purple hair dye, my favourite is the directions violet hair dye.

You can either add a small amount of this to your shampoo and use it like above, or alternatively you can mix it with conditioner to achieve a pale purple colour and then apply it to your hair, leaving it on for around half an hour. Though it does take a little bit of trail and error to learn what shampoo to dye ratio works for you, it's a very good way of saving money!

If you have any more questions regarding my bleaching technique, please feel free to comment.

Mini Book Review - My Friend Dahmer


After talking about my secret fascination with serial killers to a friend, he mentioned that he owned this graphic novel, which excited me greatly. Jeffrey Dahmer is, in my opinion, one of the most interesting serial killers of all time- I've watched several documentaries about him, but this was a whole new take on his story. The graphic novel was drawn by a man who went to school with jeffery, and tells the story of his high school years. Derf Backderf was almost friends with Jeffery and it's a very interesting view into to his life. I thoroughly enjoyed reading this, and if it's the sort of thing that captures your fancy, I'd recommend you give it a shot!

Tuesday, 3 March 2015

My Experience With Piercings.


I don't have many piercings, I've had 10 total. However, I've decided today I would share with you my experience overall. I've included below some photos of my piercings, and will talk about them in chronological order.


Please excuse the bad quality photos, they are from Instagram and I had to zoom in on a lot, especially the middle one.

First and Second Lobes
I got these done, as most young girls do- at a beauty salon with a gun. I do NOT recommend EVER using a gun when having a piercing, even on lobes. They are extremely unsanitary and will cause extreme trauma to the ears- just watch this 1 minute video:

However I was too young to know better and my parents had been brought up to believe they were fine. 

My second lobes, however, I got pierced with a needle, which made for a much quicker and less painful healing experience all around. Lobe piercings are pretty easy to heal in most peoples experience, and don't take an awful lot of effort.

Vertical Ear Rim
I'm not exactly sure what to call this piercing, as I haven't seen it around much. It's the golden stud at the top of my ear, and I loved it to pieces. It was pretty painless considering it was my first cartilage piercing, and healed pretty easily to begin with- However, after knocking it very hard accidentally, it became very agitated and sore. Unfortunately, I recently had to take it out, as it started to migrate. 

Anti-Tragus
This is the piercing shown in the last picture, that goes through the inside nodule of the ear. For me, this was my most painful piercing by far. It's been around 8 months since I had it done and it still hasn't come close to healing. It's finicky and easily agitated, but I love the way it looks so much I am determined to keep at it. Most anti-tragus piercings take around a year to heal, so I am awaiting the day! I'm currently wearing an anotometal curved barbell.

Septum
My septum was the easiest piercing, both to have and to heal. The piercing itself felt like a very intense sneeze, and my nose stung a little for the rest of the day. However after that the healing was quick and easy. The nose is pretty much self cleaning, and so you are advised to clean it less regularly than most piercings to avoid over cleaning- which is handy if you tend to forget like me. Healing took around 8 weeks, and I can now leave the jewellery out for a short period of time without the hole closing up. If you're thinking about getting your septum pierced, I'd definitely go for it!

Auricle
This piercing is located on the middle of the ear rim. I am currently wearing a moonstone labret from Neometal (Comment if you want me to make a separate blog post about after-care and jewellery). This piercing was virtually painless and hasn't caused me much trouble at all to heal.

Industrial/Scaffold
Again, this piercing didn't hurt much for me- the piercer pierced the bottom portion of my ear first, which stung a little and then pierced the top portion, which I didn't even notice. The main problem with this piercing for me has been the healing process. They tend to take between a year and a year and a half to heal, and during that time it tends to be sore a lot due to the extra pressure of the long bar. Also, be warned that if one end of the piercing gets agitated, the other end will soon follow. 

Nipples
Yes, I have both my nipples pierced, and yes- it hurt. A lot. Surprisingly though not as much as my anti-tragus hurt, and not so much that I wouldn't do it again. However I did swear pretty loudly during the process. I've had a breeze healing them so far, with no problems what-so-ever. Though I don't wear a bra, so I feel as though that makes a difference, as I know they can be very difficult to heal for some. 

Conch
I was very scared of getting my conch pierced, as its a huge bit of your ear! But after wanting it for so long I decided to go through with it. I was pleasantly surprised at how painless it was, the only part that hurt was the needle coming out of the skin behind my ear, and then the jewellery switch. I'm currently wearing a neometal lavender opal in it.


Got any questions about piercings? I'm more than happy to do an Q&A, after-care or jewellery posts. 


Monday, 2 March 2015

Recent Haul and Review.


My birthday was just over a week ago, and so I chose to treat myself to a few products I've been looking at for a while. I've had the chance to put the products to the test, and decided to review them for you all!

1. E.L.F Daily Brush Cleanser. 
£3.95 / $3.00

I bought this product in an attempt to force myself to clean my brushes more often, and I have to say it has worked. I simply spray the cleanser over the brush, then rub the product off on a towel. Although it does do a reasonable job at cleaning brushes, I can still easily see left over pigment, especially from darker coloured shadows. On a basis of price to product ratio, I feel as though this is very expensive in the UK for the small amount you get- at an equivalent of just over $6! It also has a very strong smell, which lingers on the brushes- and I have found slight damage to my brushes since I started using this. 

WARNING: This product is designed to be used on synthetic brushes and not natural brushes.

Personally, I will not be re-buying this product, however it is something worth trying out if you can find it on offer. 


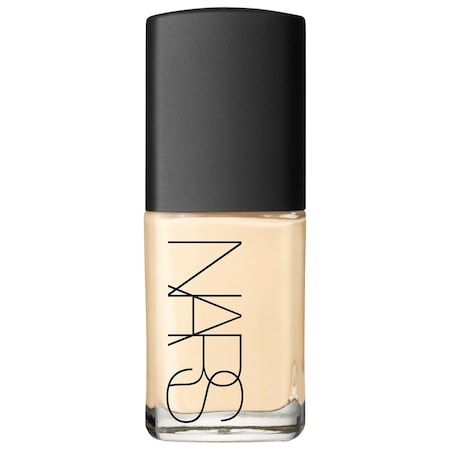
2. NARS Sheer Glow Foundation in Siberia.
£31.00 / $45.00


As someone who hasn't worn foundation in 5 years, I was hesitant to spend this much money on one. However, I asked for a sample at the NARS counter out of curiosity and instantly fell in love, less than a week later I bought the full sized version. I gave up wearing foundation when I was younger as I found that my sensitive skin would become irritated and break out from even wearing it for a few hours! However, this foundation has impressed me so much! Not only can I not even feel it on my face, but the foundation itself makes my skin look so clear and radiant. I do find that I break out if I wear this every day for a few days, however it a vast improvement on my previous experiences with foundation. If you have the spare money, I cannot recommend this enough!

3. M.A.C Self-Sharpening Eyebrow Pencil in Lingering.
£13.50 / $16.00

Having only ever filled in my eyebrows with my Urban Decay eyeshadow in Naked, I decided I wanted to step up my eyebrow game and delve into the world of eyebrow pencils. I knew I wanted something very thin, light and precise- and this M.A.C pencil gives me just that. It's so quick and easy to use, and lets my subtly build on the patchy areas of my brows without making them look unnatural. I cannot recommend this enough to someone who (like me) is just entering the world of drawing on eyebrows!

4. Anastasia Dipbrow Pomade in Medium Brown.
£15.00 / $18.00


I stumbled across this on sale, and after all the wonderful things I had heard about it, decided to bite the bullet and pick it up. Choosing the right colour was the main issue for me, as I had no option but to order it online. I ended up choosing medium brown over dark brown as my eyebrows are a light ashy brown, and it matches very well (as long as I apply it with a light hand). It took a couple of tries to get it right, but now I find it easy to use- Plus it will last through absolutely anything!

5. NARS Copacabana Multipule.
£29.00 / $39.00


I honestly cannot put into words how much I love this product. Every time I have gone up to the NARS counter without fail, I would swatch this on my hand and gaze at awe in how pretty it is. So I decided that it was time to finally commit and I couldn't be happier, I want them all! I'm currently using this as my highlighter, though I am debating putting it all over my face under my foundation as an illuminator as it makes my skin look so dewy and radiant. 

6. Sleek Blush in Rose Gold.
£4.49 / $6.99
I am constantly hearing good things about the brand sleek, and decided to put them to the test with one of their famous blushes. The rose gold one is probably the most famous and is often referred to as a dupe for NARS Super Orgasm. I have to say I am very impressed by the quality of this blush- I tend to stray away from drugstore brands, as I don't wear makeup everyday and so enjoy the quality of mid/high end makeup when I do wear it. However I do really love this blush, and am considering buying more of their products in the near future. The rose gold micro glitter almost serves as a highlight, so I like to apply this blush a little higher along my cheek bones that I normally would.


NOTE: I apologise if any of the American pricing is wrong, I used google to search for the American pricing of each product- However there may be some mistakes.


Sunday, 1 March 2015

D.I.Y Brush Cleaning

How I Clean My Makeup Brushes

Personally, I spend a lot of money on my makeup brushes- I find them to be one of the most important parts of makeup application. I feel as though you can achieve a flawless look with cheap makeup, as long as you have high quality brushes. So, I like to keep them clean and healthy, not only to protect my skin, but also to lengthen the life of the brushes. 

So, how do I do it?
Well, brush cleaners/cleansers can be very expensive, so I personally choose to use organic soap. The soaps from Lush are always amazing, and don't contain any harmful chemicals that could ruin the shape or texture of the brush. The one I'm personally using at the moment is called Baked Alaska, and looks like this:

Disclaimer: Not my image.

I run the sink full of warm water (Don't use boiling water as you could melt the glue inside the brush), then soak my brush, before swirling it over the soap, and rubbing it in my hand. I keep doing this until the water from the brush runs cleaner, then gently towel dry the brush, and lay it to air dry. You should always allow your brushes to air dry in a way that the bristles of the brush are below the bellow, so that water runs out of the brush as it dries.

I repeat this process once a week, and use E.L.F's spot cleanser each time I use the brush. WARNING: This brush cleanser should only be used on synthetic brushes!


Thursday, 18 July 2013

D.I.Y rings

Okay so I made these metal rings, and although I dont really feel like this need an explanation on how to make them, I thought I would show you all anyway.
All you have to do is simply twist the wire using the plyers until you get the shape you want, easy!