Showing posts with label healthy. Show all posts

Thursday, 5 March 2015

My Favourite Lush Products

I am a big fan of Lush product, I truly believe that everything they sell is worth the money they charge, so here are my favourites from their store so far.

1. The Charity Pot.


Not only does it serve as a killer moisturiser, but also 100% of the profits go to charity! (Except taxes, they go to the government).

2. Rising Phoenix Bath Bomb.

I've tried nearly every bath bomb lush sells, but this is one of my favourites. The scent is described as cinnamon on the website, which is one of my favourite all time scents. The bath bomb itself is layered full of different colours and golden glitter, which turns the bath an amazing colour!

3. So White Bath Bomb.
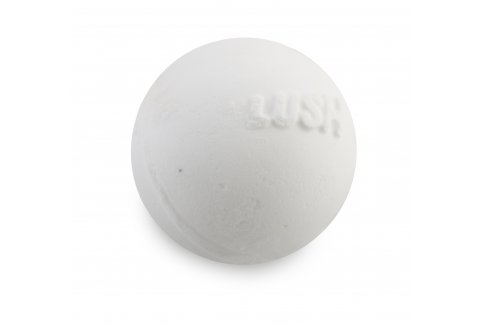
This was one of the first bath bombs I ever bought from lush, and I've been re-buying it every time since. The bath bomb itself looks pretty boring, however once dropped into the bath it reveals a pink centre. The scent is clean and fresh, which I love.

4. D'Fluff Strawberry Shaving Soap.


I was very sceptical about this at first, but it was recommended to me so I decided to try it out. I was blessed with almost white, very thin and slow growing leg and arm hair, so rarely have to shave. This means that products like this don't normally do much for me, as I don't shave often enough to develop dry or flaky skin, but this product surprised me- it leaves me with the softest feeling legs you could possibly imagine, and you only need the tiniest bit! Plus, I love strawberries, which is a bonus.

5. Jason and the Argan Oil Shampoo Bar.


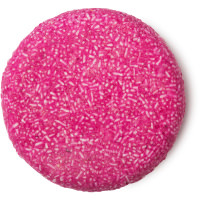
I will warn you guys, this thing smells super strong. It's a great scent but you can smell it from miles away. Nonetheless, it gives my super thin hair life and body, which is what I want from a shampoo, and it's super long lasting!

6. Mask of Magnaminty.


I wouldn't usually go for this product, as I absolutely hate the smell of mint. However, it claims to reduce redness and blemishes, and I've found that all lush products so far have done exactly what they say on the tin. My skin has been playing up the last couple months, and I have no idea why- so I needed something to help calm it down. This isn't a miracle fix for blemishes, but it will reduce them and help calm you skin over time, which is what I'm looking for. I use this once a week and I find that it really helps keep my skin in control!


Wednesday, 4 March 2015

How I Bleach My Hair White

My hair has been bleached white fairly frequently for the last few years:
Photo
Photo
And over this time I have learned a few things about keeping my hair healthy looking whilst still achieving the lightest colour possible. So, I decided to share a few tips and tricks that I have learned along the way. 

1. Coconut oil.


Everybody knows that you shouldn't bleach clean hair, but why? Well, when our hair gets greasy, the oil forms a protective barrier against the bleach, stopping it from drying out or getting damaged. As I don't like to leave my hair get too greasy before bleaching it, I tend to use coconut oil on second day hair instead. Coconut oil is solid, but has a very low melting temperature, so I scoop out a small amount- warm it in my hands and then apply a thick coat all over my hair. I tend to leave this on for around half hour before bleaching, as coconut oil is really good at adding moisture to your hair. 
Don't bother buying special coconut oil branded for use on hair, as organic coconut oil will be cheaper and does the exact same job. You can find this is your local grocery store or organic health food shop. 

2. Generic Bleach.
Rather than use a coloured bleach, such as a cool ash tone or a honey blonde tone- I choose to use a bleach which does not contain a toner and tone my hair myself afterwards. The bleach I use is Jerome Russell's Bblonde bleach in medium lift, as I have a pretty light hair colour naturally.

I choose to use this bleach as you get the bleach sachets and developer separately so there is little to no waste, and I've found that using this bleach allows me to get the lightest colour my hair is capable of achieving.

4. Bleaching Technique.
There's nothing complicated about my bleaching technique, but I thought I should share it with you regardless. Basically, I split my bleaching sessions into two parts. First, I will apply bleach to my roots and the darkest parts of my hair, such as sections which didn't lighten as much last time. I will leave this on for around half an hour (or half the time noted on the bleach box). Then, I will go back and apply more bleach to the rest of my hair, concentrating again on the darkest spots. 

I don't always bleach my whole head, only if a lot of my hair isn't the colour I want it to be yet- as I do frequently change between my natural hair colour and white blonde.

3. Fudge Clean Blonde Toner Shampoo.


Toning is a really important part of achieving the right colour, personally I prefer an icy white colour, and so I use a purple toner. My favourite way of toning my hair day to day is to use a toning shampoo, which is just what it sounds like- a shampoo containing purple dye to counteract the yellow tones in your hair. My favourite one so fair is the Fudge Clean Blonde Violet Toning Shampoo. I apply this like regular shampoo, lathering it all over my hair, and then leave it on for five minutes or so, depending on how yellow my hair is looking at the time. It's a really easy way of keeping your colour up to check.

4. D.I.Y Toner.
If this option doesn't really appeal to you, you can save a lot of money by making your own toner or toning shampoo. All you need to do is buy a dark purple hair dye, my favourite is the directions violet hair dye.

You can either add a small amount of this to your shampoo and use it like above, or alternatively you can mix it with conditioner to achieve a pale purple colour and then apply it to your hair, leaving it on for around half an hour. Though it does take a little bit of trail and error to learn what shampoo to dye ratio works for you, it's a very good way of saving money!

If you have any more questions regarding my bleaching technique, please feel free to comment.

Sunday, 1 March 2015

D.I.Y Brush Cleaning

How I Clean My Makeup Brushes

Personally, I spend a lot of money on my makeup brushes- I find them to be one of the most important parts of makeup application. I feel as though you can achieve a flawless look with cheap makeup, as long as you have high quality brushes. So, I like to keep them clean and healthy, not only to protect my skin, but also to lengthen the life of the brushes. 

So, how do I do it?
Well, brush cleaners/cleansers can be very expensive, so I personally choose to use organic soap. The soaps from Lush are always amazing, and don't contain any harmful chemicals that could ruin the shape or texture of the brush. The one I'm personally using at the moment is called Baked Alaska, and looks like this:

Disclaimer: Not my image.

I run the sink full of warm water (Don't use boiling water as you could melt the glue inside the brush), then soak my brush, before swirling it over the soap, and rubbing it in my hand. I keep doing this until the water from the brush runs cleaner, then gently towel dry the brush, and lay it to air dry. You should always allow your brushes to air dry in a way that the bristles of the brush are below the bellow, so that water runs out of the brush as it dries.

I repeat this process once a week, and use E.L.F's spot cleanser each time I use the brush. WARNING: This brush cleanser should only be used on synthetic brushes!